Turn Ableton Live into an LED light show. LumiDI is an open-source Max for Live
device that streams pixel animations as MIDI notes to a Teensy-driven WS2812B
strip — tempo-synced, automatable, and hackable.
No DMX, no Art-Net, no serial protocol to invent — just MIDI notes. The LumiDI
device runs an animation engine inside Live and streams complete pixel frames
(~30 fps) out the track's MIDI output. A Teensy 4.0 running the open firmware
shows up as a class-compliant USB-MIDI port, decodes the notes, and drives the
strip. Because it's plain MIDI, everything is automatable, tempo-syncable, and
recordable like any other instrument.
Ableton LiveLumiDI Max for Live device
→
MIDI notespixel frames, ~30 fps
→
Teensy 4.0USB-MIDI firmware
→
WS2812B stripthe light show
…or route the same notes to an IAC bus and preview in the
browser simulator — no hardware needed.
The Ableton device
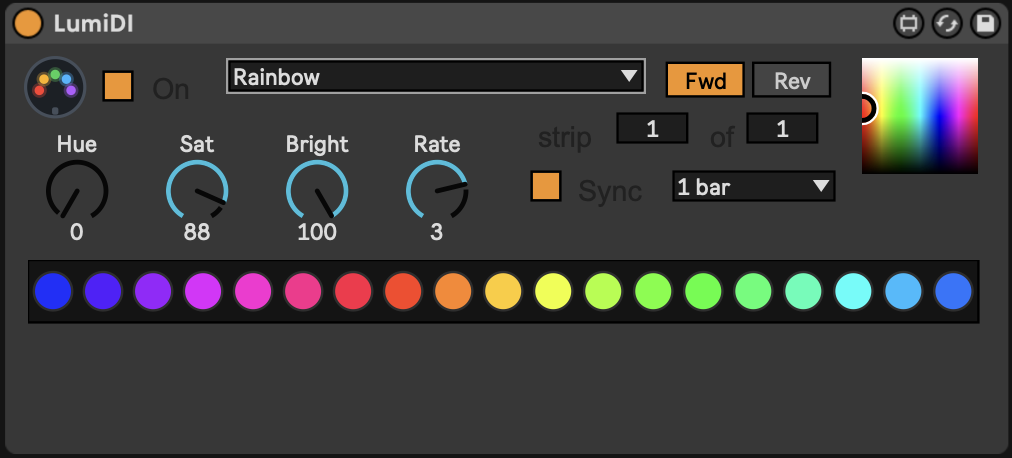
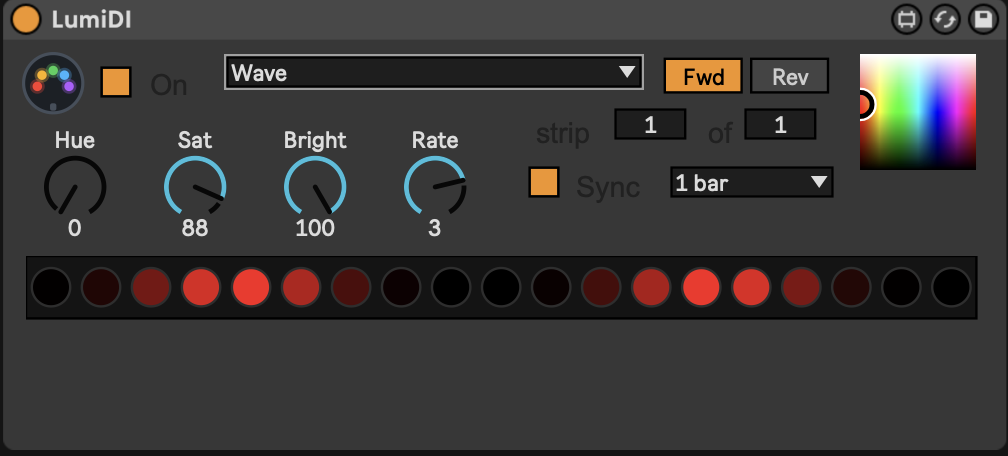
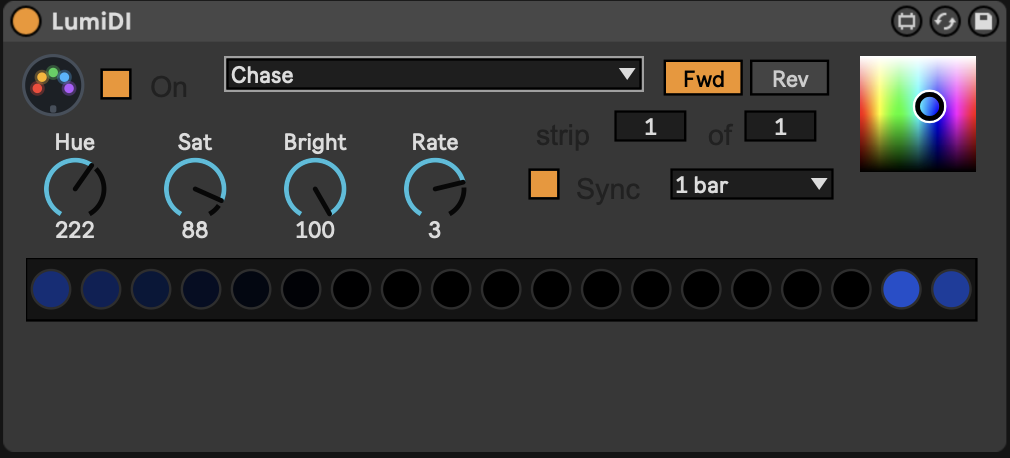
A Max for Live MIDI effect with 15 animations — Solid, Pulse, Chase, Rainbow,
Strobe, Scanner, Breathe, Wipe, Theater, Burst, Hue Drift, Sparkle, Fire, Flip,
and Wave. HSV color dials, a direction switch, free-run rate, and beat sync that
locks the animation cycle to Live's transport (e.g. exactly one bar). Every
parameter is automatable.
Try it — right here
Not a mock-up: this is the same lumidi-engine.js the device runs in
Live, loaded straight into the page and driving a virtual 19-pixel strip through
the real MIDI protocol. And just like in Live, animations only move while the
transport plays — hit Stop and the frame freezes.
LumiDI
On
Sync
The real thing in Live
Rainbow — the strip preview along the bottom mirrors exactly what's streamed to the LEDs.
WaveChase
Using it
Download LumiDI.amxd (or build it from source with python3 ableton/build_amxd.py).
Drag it onto a MIDI track in Live.
Set the track's MIDI To to the Teensy's MIDI port — or to an IAC bus to preview in the simulator.
Set the track's MIDI From to "No Input". This matters: on "All Ins" the track hears its own output, trips Live's feedback protection, and knob changes get silently swallowed.
Press play. Animations follow Live's transport — with Sync on (the default) the cycle locks to your tempo; turn it off to free-run at the Rate dial's speed.
The hardware is a Teensy 4.0 and a strip of WS2812Bs plus two passive components —
for a strip this size, USB alone can power it.
Firmware, the device, and this page all live in
the repo.
Powers the Teensy (and, in the USB-powered build, the strip) and carries the MIDI. You probably have one already.
$2.95
Estimated total
≈ $40 (≈ $48 with the PSU)
Prices as of August 2026, before shipping — and the links are just known-good
examples; any equivalent part works.
Circuit
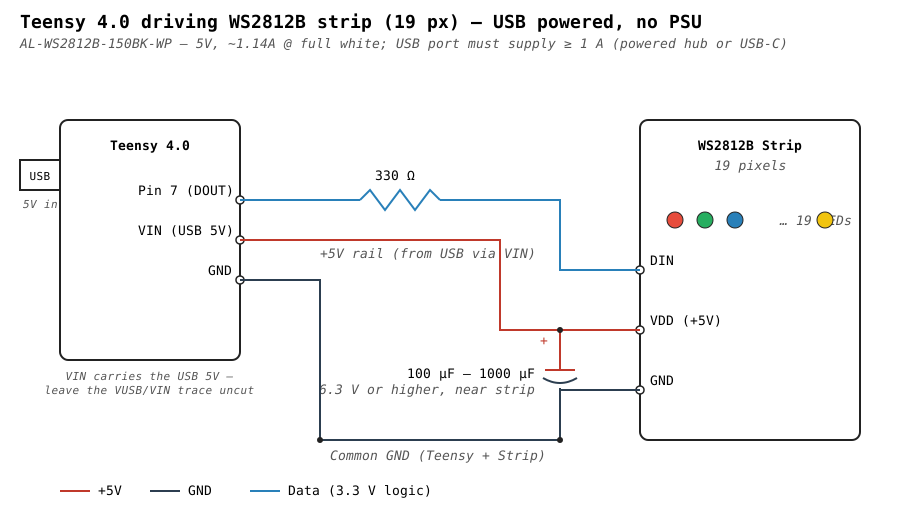
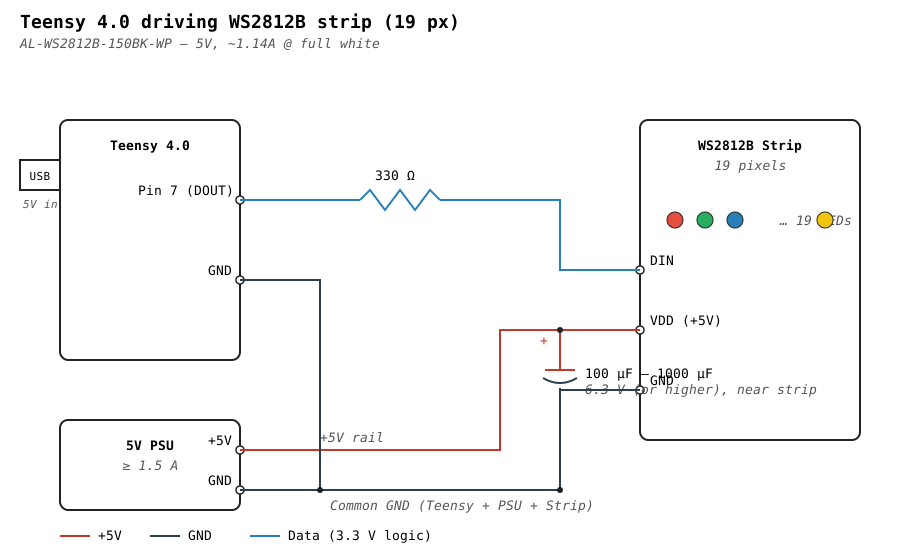
The data side is the same either way: Teensy pin 7 through the 330 Ω resistor to the
strip's DIN. The choice is where the strip's 5 V comes from.
USB powered (no PSU). 19 pixels draw at most ~1.14 A, which a powered USB
hub or a laptop's USB-C port supplies happily — so the strip can hang off the Teensy's
VIN pin, which carries the USB 5 V. A plain USB 2.0 port only guarantees
500 mA, so the firmware caps the strip's draw (see below). Keep the capacitor; it matters
more here, where there's less headroom for the surge when a frame latches.
USB powered: strip VDD fed from the Teensy's VIN pin; grounds common. Plug the Teensy into a powered hub or USB-C port.
External PSU. For longer strips, or if all you have is a USB 2.0 port, power
the strip from its own 5 V supply instead. The Teensy still runs off USB; just tie the
grounds together.
PSU powered: strip VDD fed from the external supply; Teensy, PSU, and strip grounds common.
Firmware
The firmware is a PlatformIO project using FastLED:
git clone https://github.com/chris-albert/lumidi.git
cd lumidi/hardware/teensy
# set MAX_MILLIAMPS to what your power source can deliver
pio run -t upload
The firmware drives 42 pixels — the protocol's limit — whatever the strip's length, so one
build fits every strip; tell the device how long yours is with its Pixels control. Several
strips on several Teensys can be numbered into one layout and run a single animation end to
end (see the device's README).
MAX_MILLIAMPS is the strip's current budget: FastLED estimates each frame's draw and
scales brightness down only when it would go over, so a full-white frame can't brown out the
port. The default of 1000 mA suits a powered hub or USB-C; use 500 for a plain USB 2.0
port, or your supply's rating for the PSU build.
Once flashed, the Teensy enumerates as a USB-MIDI port — point Live's MIDI To at it and you're done.
The MIDI protocol
The firmware is deliberately dumb — anything that can send MIDI notes can drive
the strip. The Max for Live device is just one client; your sequencer, script,
or microcontroller can be another.
notes 0–125stage one color channel: pixel = note ÷ 3, channel = note mod 3 (R, G, B)velocity vchannel value = v × 2 — except velocity 1 writes 0 (velocity 0 is a note-off and is ignored)note 127"show" — latch the staged frame to the LEDs
Pixel writes only stage; nothing changes on the strip until note 127 arrives, so
a frame always appears atomically.
No hardware? Simulate it
The strip simulator renders the same MIDI stream in the
browser — pick a MIDI input, point Live's MIDI To at an IAC bus
(macOS: enable the IAC Driver in Audio MIDI Setup), and watch the strip.
It needs Chrome for Web MIDI, logs every decoded pixel write, and shows the
latched frame rate — handy for debugging your own protocol clients too.
Running several strips? The stage simulator places any
number of virtual devices in 2D so you can choreograph a whole layout.